

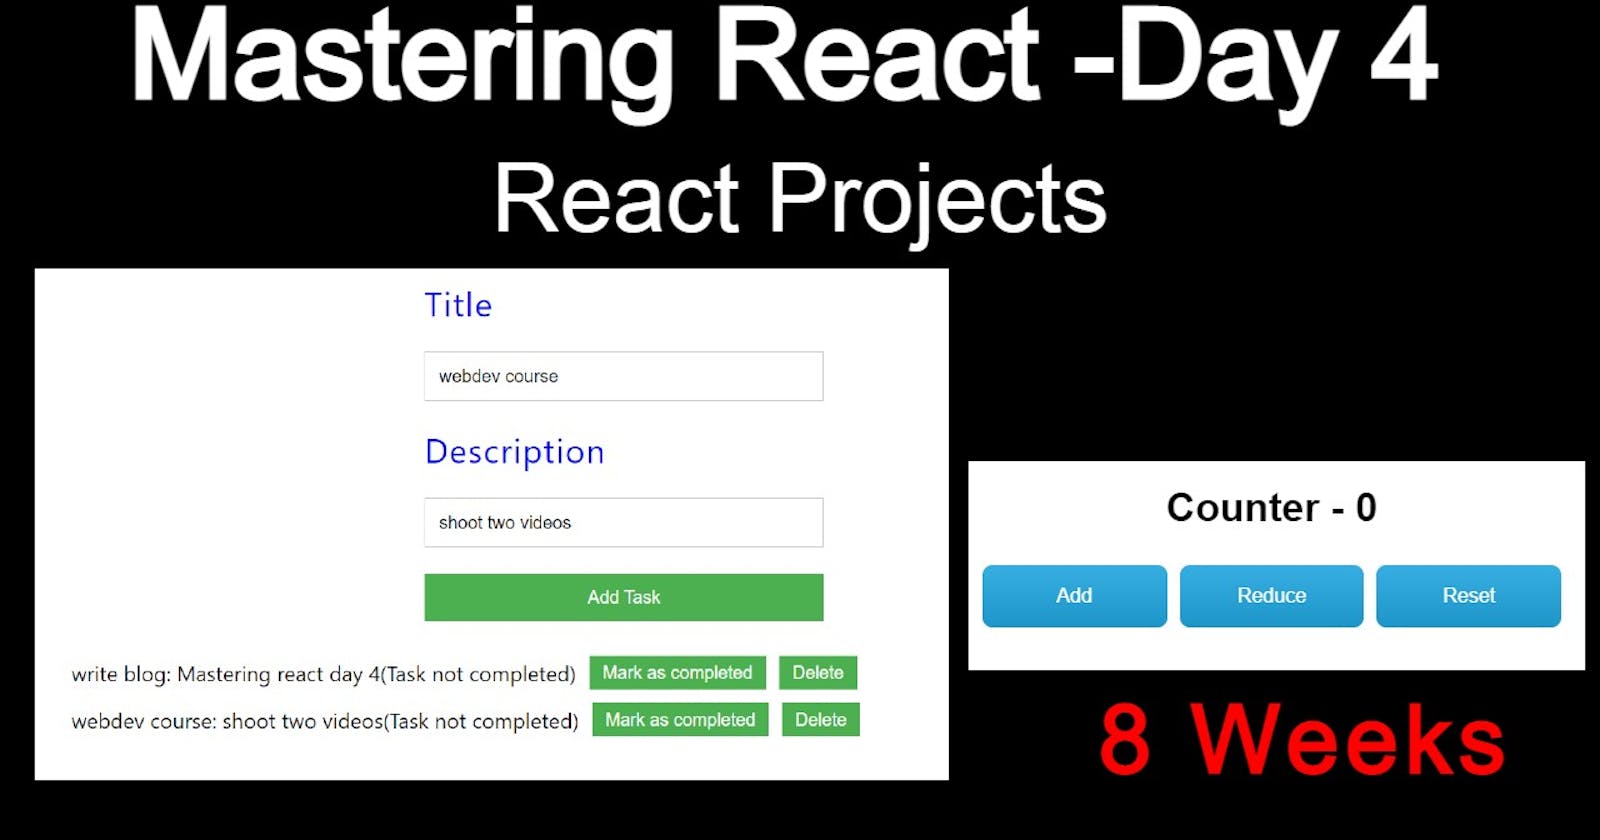


Hello, Hashnoders or learners!🎉🎉
today we will study some really amazing projects such as a to-do list and an advanced counter.
Simple Counter
Now I believe , all of us are familiar from how to start and install React in PC and how to use it , therefore from now onwards for small projects instead of using VS code , we will be using codesandbox.
So head over to the codesandbox.
Activity -1
Build a simple counter using React functional components that uses useState hook. The counter should have three buttons:
An "Add" button to increment the count by 1.
A "Reduce" button to decrement the count by 1.
A "Reset" button to reset the count to 0.
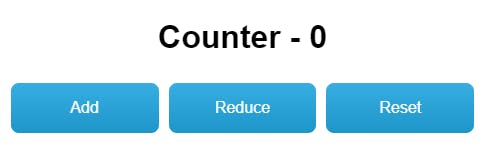
The counter should look like this, don't worry about the CSS part just try to do it.
We have already completed such a question yesterday.
let's do it!!
my approach is always to divide the question into small fragments.
import usestate from React.
Initialize the count state variable with a default value of 0.
const [count, setCount] = useState(0);Define a function add to increment the count by 1.
Define a function reduce to decrement the count by 1.
Define a function reset to set the count to 0.
Now try it yourself.
below is the code, I will never recommend seeing this code if you have not tried it.
Be honest with yourself.

 import "./styles.css";
 import { useState } from "react";

 export default function App() {
   const [count, setCount] = useState(0);

   const add = () => {
     setCount(count + 1);
   };

   const reduce = () => {
     setCount(count - 1);
   };

   const reset = () => {

     setCount(0);
   };

   return (
     <div className="App">
       <h1>Counter - {count}</h1>
       <button onClick={add}>Add</button>
       <button onClick={reduce}>Reduce</button>
       <button onClick={reset}>Reset</button>
     </div>
   );
 }
Activity -2
TO-DO APP
Objective:
Build a to-do list application that allows users to add and track tasks, mark them as completed or not completed, and delete them from the list.
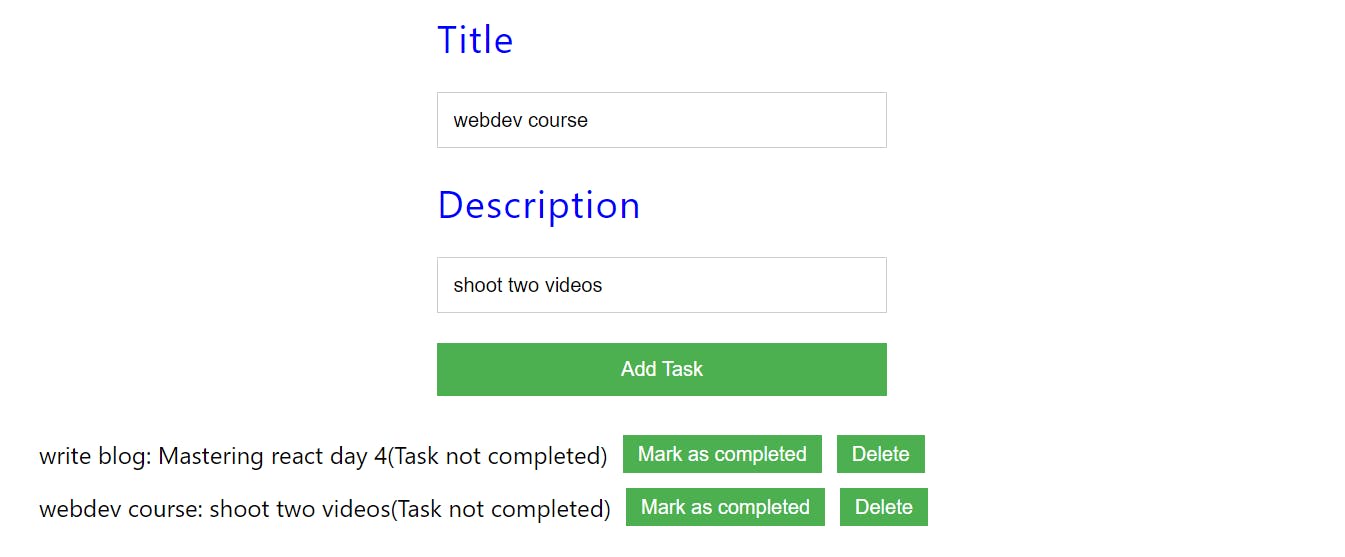
Features:
A form that allows users to enter a new task title and description, and a button that submits the form and adds the task to the to-do list.
A list that displays the tasks in the to-do list, including their title, description, and status (completed or pending).
A button for each task that allows the user to mark it as completed.
A button for each task that allows the user to delete the task from the list.
i have added the basic form with the basic CSS in the below link of sandbox go and fork it and then we will start the task one by one.
https://codesandbox.io/s/lively-water-cinm5r?file=/src/App.js
Part-1
A form that allows users to enter a new task title and description, and a button that submits the form and adds the task to the to-do list.
let's divide it into small bits.
create a form with two inputs, title, and description. (already done in the code sandbox template)
now we need to make sure when add task is clicked, the data inside is actually captured.
let's make a small dummy object that how our data will look like:-
  let task = {
      title: 'some title',
      description: 'some description',
      completed: false,
    };
now let's make a function submit that will make an object-like task:-
const submitTask=(e)=>{
// because of below function page will not reload on submission
e.preventDefault()
}
// add name attribute to input tags so that when we will submit the form, we can easily get values of input.
// also assign event listener onSubmit-{submitTask}

  <form action="" onSubmit={submitTask}>

          <label htmlFor="" >Title</label>
          <input type="text" name="title"/>

          <label htmlFor="">Description</label>
          <input type="text" name="description"/>

        <input type="submit" value="Add Task" />
      </form>

// lets do some modification in our submittask function

 const submitTask = (e) => {
    e.preventDefault();
// we can get value of title and description input like below code:-
// if you are facing issue on submit
    let task = {
      title: e.target.elements.title.value,
      description: e.target.elements.description.value,
      completed: false,
    };

  };
now we are getting the value of the task now we need to store it somewhere therefore we will use useState React hook.
// we will assign empty array value to `todo`.
const [todo, settodo] = useState([]);
 const submitTask = (e) => {
    e.preventDefault();

    let task = {
      title: e.target.elements.title.value,
      description: e.target.elements.description.value,
      completed: false,
    };
// we are updating todo on every submit
      settodo([...todo, task]);
  };
our first part is complete
Part-2
A list that displays the tasks in the to-do list, including their title, description, and status (completed or pending).
we need to do some changes in our JSX to display the task.
we need to add a ul and under ul, we need to add all the todo in list format.
we will also use a map like below code:-
<ul>
      {todo.map((task) => (
        <li key={task.title}>
          {task.title}: {task.description}
          {task.completed ? <span> (Task completed) </span> : <span> (Task not completed) </span>}

      ))}
    </ul>
I have assigned a key as the title. I would recommend you add an id that is generated by Math.random() and then store that as a key.
some of you might be confused with the below code
{task.completed ? <span> (Task completed) </span> : <span> (Task not completed) </span>}
this is basically a ternary operator as we cannot write if/else. if you are not sure about ternary operators do check out my blog on a conditional statements.
let's move to part 3.
Part-3
Button for each task that allows the user to mark it as completed.
I would like you to try it yourself, let me write pseudo code, and still, if you are unable to do it, then I will share the code.
The objective of this function is to mark a task as completed in the to-do list.
The function takes in a parameter "title", which represents the title of the task that needs to be marked as completed.
The function uses the useState hook "set todo" to update the state of the to-do list.
The function maps through the previous state of the todo list, and for each task, it checks if the title of the task matches the parameter "title". If it does, it returns a new object with the same properties as the task, but with the "completed" property set to true. If the title does not match, it simply returns the task object as it is.
Finally, the function returns the updated list of tasks with the marked task.
  const markAsCompleted = (title) => {
    settodo((prevState) => {
      let updatedTasks = prevState.map((task) => {
        if (task.title === title) {
          return {
            ...task,
            completed: true,
          };
        }
        return task;
      });
      return updatedTasks;
    });
  };
Part-4
A button for each task that allows the user to delete the task from the list.
we can use a simple filter function that will filter all the data like the below code:-
  const deleteTask = (title) => {
    settodo((prevState) => prevState.filter((task) => task.title !== title));
  };
Final code - (Confidential)
watch it after trying for 24 hrs.
// import logo from "./logo.svg";
import "./App.css";
import { useState } from "react";

function ToDoList() {
  const [todo, settodo] = useState([]);

  const submitTask = (e) => {
    e.preventDefault();

    let task = {
      title: e.target.elements.title.value,
      description: e.target.elements.description.value,
      completed: false,
    };
    settodo([...todo, task]);
  };
  const markAsCompleted = (title) => {
    settodo((prevState) => {
      let updatedTasks = prevState.map((task) => {
        if (task.title === title) {
          return {
            ...task,
            completed: true,
          };
        }
        return task;
      });
      return updatedTasks;
    });
  };
  const deleteTask = (title) => {
    settodo((prevState) => prevState.filter((task) => task.title !== title));
  };

  return (
    <div className="App">
      <form action="" onSubmit={submitTask}>

          <label htmlFor="" >Title</label>
          <input type="text" name="title"/>

          <label htmlFor="">Description</label>
          <input type="text" name="description"/>

        <input type="submit" value="Add Task" />
      </form>
      <ul>
      {todo.map((task) => (
        <li key={task.title}>
          {task.title}: {task.description}
          {task.completed ? <span> (Task completed) </span> : <span> (Task not completed) </span>}
          <button onClick={() => markAsCompleted(task.title)}>Mark as completed</button>
           <button onClick={() => deleteTask(task.title)}>Delete</button>
        </li>
      ))}
    </ul>
    </div>
  );
}

export default ToDoList;
this is it for today guys, this blog took approx 15 hrs to write because I have made so many changes so that I can deliver the best.
Keep Learning Hashnoder!